Quick And Easy Banana Nut Bread Recipe!

Look out! Are you a banana nut bread fan? Holy cow, do we have the ultimate recipe in store for you today! One bite of this, and you’ll want a piece for breakfast, lunch, and dinner. Oh, and lets not forget about dessert! As far as work is involved for this type of dish, we found this to be a quick and easy banana nut bread recipe. Go ahead and give it a try. Then come back here and let us know what you think, in the comment section below!
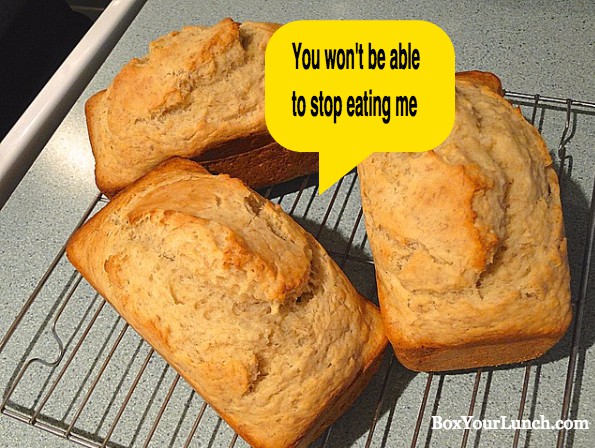
quick and easy banana nut bread recipe

Quick and Easy Banana Nut Bread Recipe

Here’s what you’ll need:

  • 1 cup All Purpose Flour
  • 1 Teaspoon Baking Soda
  • Half Teaspoon of Salt
  • Half cup of Butter (margarine, shortening, etc, may be used)
  • 1 cup Brown Sugar
  • 2 Beaten Eggs
  • 1 cup Mashed Over Ripe Bananas
  • Half cup Chopped Walnuts or Pecans
  • Half teaspoon vanilla (optional)

(Similar recipes can also be found on allrecipes.com and food.com)


  1. Preheat your oven to 350°
  2. Grease and flour a 9×5 inch loaf pan
  3. In a large bowl, sift together the four, salt and baking soda.
  4. In a separate bowl mix the butter and sugar until its a creamy consistency. Now add the bananas, eggs, (optional vanilla) and walnuts to your butter/sugar mixture and mix until well blended.
  5. Now take the wet mixture and add it to your larger bowl of dry mix. Blend the two together until well mixed.
  6. Now simply add the mixture to your loaf pan and set it in the oven.
  7. Bake for 60 -70 minutes until a knife comes out clean when placed in the crown of the loaf.
  8. Let the loaf cool in the pan for 5-7 minutes and then flip it onto a cooling rack.
  9. Once cooled, wrap it in foil and place it in the refrigerator

That’s all there is to it! Once you get one bite of this bad boy, it’s going to make you want to bake one every Sunday, so you have some left for the week. (If it will last that long).

We found out that it is very important to wrap it in foil and place it into your refrigerator in order to keep it moist and fresh. That’s key!


Add Another Layer of Amazingness to your Banana Nut Bread 

If you’d like to take your banana nut bread to another level, this will take just a bit more work, but you may find it worth it. Let’s add a sweet topping to that already delicious loaf, shall we?

Cream Cheese Frosting:

  • 4 oz Cream Cheese at room temperature
  • 1/4 cup Butter at room temperature
  • 1 cup powdered sugar
  • 1 tablespoon milk
  • Chopped walnuts or pecans (optional)
  1. Beat the softened cream cheese and butter together on with your mixer on medium speed for 2-3 minutes until combined and makes a smooth creamy consistency.
  2. Now add the powdered sugar and continue to beat until the mixture becomes thickened.
  3. Add the milk and continue to beat on medium speed for another 2 minutes. At this point, you can add more powdered sugar until desired thickness is reached. 

Once the banana bread has cooled off, you can spread this all over the top. There may be some frosting leftover depending how thick you layer it on top. Now add the nuts if desired. You’re done!


We really hope you love this recipe as much as we do. As a side note, you can replace the brown sugar with white sugar for the banana bread if you don’t have any on hand. We just think it tastes better with brown. But either way, it’s a great loaf!

Please take a moment to comment and let us know what you think after you’ve made this. And we’d love if you’d show some love by sharing this post with your favorite social networks! And be sure to enjoy this quick and easy banana nut bread recipe, soon! 🙂

Check out our other post, where you can learn
how to keep banana’s ripe for over a week!


Share

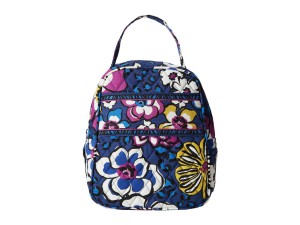
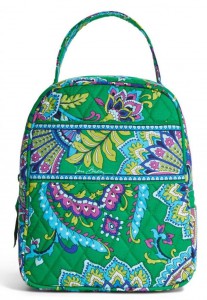
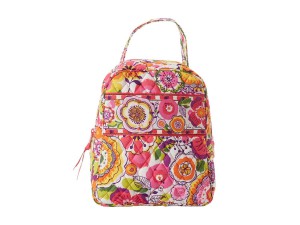
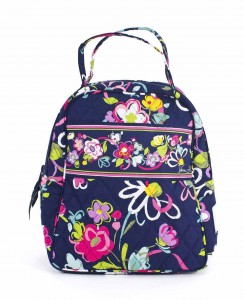
Vera Bradley Lunch Bunch Review

If you’re unfamiliar with Vera Bradley, you may be in for a wonderful surprise. Vera Bradley lunch bunch bags are super popular with teens and college students, with adults close behind, right on their tails. Fans of Vera Bradley products will gloat with glee, of her beautiful patterns and high-quality merchandise. In this post, we’re going to explore another one of those “Gotta get your hands on” items. Vera’s take on today’s lunch box. So let’s get into the Box Your Lunch Vera Bradley Lunch Bunch Review.

SPECS:

  • Holds most pre-packaged or frozen meals or Thermos®
  • Slip pocket and a large zippered opening, plus an ID window
  • Available in select colors
  • Care: Machine Wash
  • Measures: 7 ½” x 9″ x 4 ¼” with 3″ handle drop
  • Average Amazon Rating of 4.5 Stars


Vera Bradley Lunch Bunch Review: Why This Bag?

Other than the obvious eye-catching designs, there are some
other elements to this bag that really make it worth a look.


  • First off, the number of designs you can choose from. This is important to collectors of Vera Bradley Lunch Bunch Bags. Yes, collectors. I’m telling you, people LOVE Vera’s stuff. And they will discontinue certain bags as they create new ones. This makes the bags even more desirable.
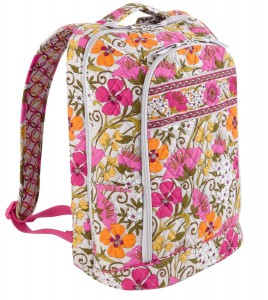
  • What’s even better is that you can find lunch bags that match backpacks, cross-body bags, and even wallets that will hold your iPhone! Or you can mix and match like we did here with the backpack and lunch bunch. Using similar colors with different prints!

The possibilities are endless!

Something else that makes these lunch bunch bags nice is that you won’t have to worry about getting caught in the rain with these. Unlike other cheaply made lunch bags, with these lunch bags, you can simply hang them up and air dry and they’re back to new. They don’t deteriorate like some others we’ve come across.

Depending on the pattern color you choose, will determine how noticeable something will show up if you get them dirty. The lighter the fabric, the more noticeable. Darker color bags will leave it hard to see any smudge that was left behind. But the great thing about these lunch bags, are the fact you can toss them right into the laundry! All without compromising the bag 🙂

Size:

This is where some people may find an issue, although we don’t, if you’re using it simply as a lunch bag. The size will seem small to some. But it can hold a sandwich, water bottle, yogurt, zip lock of snack, and an ice pack with some room to spare. This bag is for lunch, not a day out walking the city. As long as it’s not over stuffed, it should work out just fine.

  • 100% Cotton Outside
  • Vinyl Lining Inside for Easy Cleaning
  • Zipper Enclosure
  • Inside Pocket for Snacks or Ice Pack
  • I.D. Window With Vera Bradley Signature on Front (fill your info on back)
  • Machine Washable
  • Super Fashionable
  • Makes for a Perfect Gift


These lunch bags are perfect for school aged kids. Like we mentioned above, college students absolutely go bonkers for these. They’d make a perfect gift!

But adults love them just as much and have collections with some holding a
hefty price tag, now that they’re discontinued.

We also think this is perfect for the office. You can simply place your bag in the refrigerator. If you don’t have a refrigerator at work, you can add an ice pack to the bunch bag.

Unfortunately, the bags aren’t insulated, but we haven’t had a problem with an ice pack keeping all day long. Seriously, these bags are just too cute not to want one. 

We really hoped you found the Vera Bradley Lunch Bunch Review helpful. We’d love if you’d share it with your favorite social media networks. If you have any other questions, let us know in the comments. Which is your favorite bag? We want to know!

Vera Bradley Lunch Bunch F.A.Q

Q.Where can I buy Vera Bradley Bags?

A. The best prices are found here on Amazon.


Q. Can you wash Vera Bradley Bags?

A. Yes! Simply put it in the washing machine with your laundry!


The Vera Bradley Lunch Bunch Review

Share

Pack A Perfect Picnic Lunch For The Lake

Who doesn’t love a picnic? A picnic lunch by the lake tops it all. You get to enjoy a warm and sunny day savoring nature’s beauty with friends and family. In order to pack a perfect picnic lunch for the lake, however, is planning well. The type of food to take, proper packaging and storage are important details that need to be sorted out to make it the perfect picnic.

Below are some tips to ensure that your picnic is just perfect!

Pack A Perfect Picnic Lunch For The Lake

Pack A Perfect Picnic Lunch For The Lake

1. Type of food to take

When thinking about the type of food to pack for your picnic , it is always better to try and select food that does not need to be preserved or refrigerated for too long.

Because it is going to be a lunch picnic, you will need to pack up snacks, side dishes and the main meal. It is important to know if you choose cold item meals (cold cuts, beverages, mayo) you’ll need to bring a small cooler.

Snacks and side dishes may include thin slices of watermelon, apples and oranges, sliced tomatoes and cucumber and properly packaged beverage of your choice – homemade iced tea, ginger beer or even vodka watermelon – for adults only of course 😉

The main course can be something like a spicy cold chicken sandwich or cold meat medley. If your preference is to snack up, like we do, try creating a collection of snack food for the picnic like oven roasted corn, crackers and cheese or good old chocolates!

Bear in mind however that any meal can make a perfect picnic, the secret is being creative.

2. How to pack it neatly

When packing the food for your picnic, it is important to use a sealable food container or bag with lids, this is so that the food does not spill in the basket and leftovers can be neatly packed back home.

Some of these containers have special spaces within for ice so that foods can be kept fresh while being transported.

Drinks are a must and for this it is better to bottle up the drinks and store in a cooler. This is because when they are bottled, you won’t require the use of cups, so less things to carry (lightweight is key!)

3. How to keep foods warm or cold

It is important to pack a lot of ice in coolers as it ensures your food does not spoil, avoid opening the coolers unnecessarily and place in a shady area to avoid quick melting of ice. Ice cubes can also be added during the picnic to drinks if you choose to use cups.

4. What to bring other than food that can make a perfect picnic for a lake

Some foods require condiments like mustard, ketchup, salt and pepper. Mini bottles or packets of this should be carried.

Picnic blanket (beats eating on the grass), utensils (preferably reusable utensils), lots of napkins (important for personal clean up) and clean up items like trash bags, paper towels, moist towelettes are a must.

And don’t forget to add some fun to your picnic! Bring a board game like Scrabble, a card game like Uno, or our personal favorite, for adults only card game, ‘Cards Against Humanity.’

We hope you’ve now got everything you need to pack a perfect picnic lunch for the lake! What are some things you might bring to a lake side picnic? Let us know in the comments!


Share

How To Prevent Bananas From Turning Brown – Video


We’ve all been there. We buy a bunch of bananas on our weekly grocery shopping day, and 3 days later we’re left with 4 uneaten bananas, brown, soft, and unappetizing. Not too mention the amount of fruit flies one of those smooshy bananas can attract. In the trash they go! It’s time we all learn how to prevent bananas from turning brown, in such a short time. We need them to last us the week, people!


Banana stripping off peel while other bananas cheer on


This whole brown banana thing can get really frustrating. It seems like the day you take them out of your grocery bag, is the same day they start to turn.


Lets first get an understanding of why bananas (or any fruit for that matter) turns brown in the first place. It’s really a simple reason, and in turn, calls for a simple solution for the banana.


From the stems of bananas, ethylene is released, causing it to ripen. Ethylene is a hormone which breaks down the sugars and pectin which are the 2 things which keep bananas hard and fresh. They will also break down the green pigment which turns your bananas yellow.


When the ethylene is released, it’s similar to when leaves fall off a tree in autumn and lose their wonderful greens and turn brown. So we need to keep that ethylene from escaping in order to keep our bananas green, longer!


Fresh Bananas


How To Prevent Bananas From Turning Brown

How To Prevent Bananas From Turning Brown

Say what now? Duct tape? Yup! In fact, pretty much any strong packing tape will work. In about 60 seconds, you can arm your bananas with a defense mechanism that will prevent bananas from turning brown.

its easy how to prevent a banana from turning brown

Here’s a super easy and preventative measure you can take as soon as you get those bunch of bananas home. Do this and they can last longer than a week! (Depending on certain conditions)

Below this video, I have added another great tip to keep them fresh even longer, and help your other fruit ripen faster! But lets get into the how to prevent bananas from turning brown video, first……

Some of the most menial things in life, are exactly the things that drives us the most crazy. ie: The rotten banana. The last thing we need is for a banana ruining our new Vera Bradley Lunch Bag, because we forgot to take it out, just one day earlier. Put a fresh banana in your bag, and it won’t turn to mush the next day!


We expect our fruit to turn. In fact, we expect it to turn pretty quick. But bananas turn brown in 3 days. If it’s a humid summer week, they could start turning in as little as 1 day.


It’s frustrating for a number of reasons. One being, the money spent on them was completely wasted. I don’t know about you, but for us, food is expensive. We live in NYC where breathing the air is expensive. We don’t need our bright yellow bananas with a bright white solid interior, to go all limp and brown. Bananas are like Superman turning into Clark Kent.

Another frustrating thing about the soft brown banana are the fruit flies they can attract. And now you have a second problem to deal with. Getting rid of those annoying fruit flies.

Brown, rotten bananas are all around, a bad thing.


Lets save the banana by following the simple steps below.


1. Cut off about a 2 inch strip of tape and place it over the dark part of the stem on top of your bananas. Press hard.


2. Now cut a larger piece of tape and wrap it around the stems tightly.


Make sure the tape is wrapped tightly and push any air bubbles out, along the way. You want to make sure none of that ethylene escapes!

Some people will use plastic wrap around the stem in place of tape.
We find that plastic doesn’t stick very well. But if you want to give your bananas an even stronger
defense system, you can put the plastic on first and then wrap it with tape to hold it all in place.

Bonus Tip!
A lot of times you’ll buy fruits like peaches or avocado, and those fruits can take days and days to ripen. Often we put those types of fruit in a brown bag for a couple days in order to get them to ripen faster.

So, if you’re the type who likes to put their bananas in a bowl for storage, then this is for you!

Place an unripened avocado in the center of that bowl, surrounded by your bananas, and the avocado will “take” the ethylene from your bananas, keeping your bananas fresh longer and your avocado will ripen faster! It’s a double wammy on your fruit. Way to stick it to em 🙂

Already have brown bananas? Don’t know what to do we them? We’ve got the perfect solution!

Thats it everyone! Thats how to prevent bananas from turing brown. Let everyone know how easy it is, by sharing this post! Do you have any tips on how to keep bananas from turning brown? We’d love to hear them in the comments below!


Image by Cool Text

Share
Share